This article describes the installation of Oracle Database 19c on Oracle Linux 7 (OL7) on VirtualBox.
This article uses the 64-bit versions of Oracle Linux 7 and Oracle 19c.
Prerequisite: Oracle Linux 7 Install on VirtualBox
You can also combine a query for multiple packages, and review the output for the correct versions. For example:
5) Create the new groups and users.


 After successful creation of database check the database status.
That's it. Completed the Oracle database 19c Installation and creating a database.
Hope this article will help you and please give your valuable comments !!
Thanks,
Chowdari
Introduction:
For installing 19c in your laptop or desktop, computer should have minimum 4 GB or more of RAM required, and minimum 30GB or more of storage required.This article uses the 64-bit versions of Oracle Linux 7 and Oracle 19c.
Prerequisite: Oracle Linux 7 Install on VirtualBox
Download Software:
Download Oracle 19c database software for Linux x86-64 from OTN or edelivery and copy the files to linux server (on VirtualBox) using winscp or shared folder.Oracle Installation Prerequisites
Either you can perform Automatic setup or Manual setup to complete the prerequisites.
Automatic Setup:
Install "oracle-database-preinstall-19c" package to perform all prerequisite setup. use the following command# yum install -y oracle-database-preinstall-19c Manual Setup:
If you have not used the "oracle-database-preinstall-19c" package to perform all prerequisites, you have to manually perform the following setup tasks.
OS Configuration and Preparation:
1) Add the following lines to the "/etc/sysctl.conf" file
fs.file-max = 6815744
kernel.sem = 250 32000 100 128
kernel.shmmni = 4096
kernel.shmall = 1073741824
kernel.shmmax = 4398046511104
kernel.panic_on_oops = 1
net.core.rmem_default = 262144
net.core.rmem_max = 4194304
net.core.wmem_default = 262144
net.core.wmem_max = 1048576
net.ipv4.conf.all.rp_filter = 2
net.ipv4.conf.default.rp_filter = 2
fs.aio-max-nr = 1048576
net.ipv4.ip_local_port_range = 9000 65500
2) Run the following command to change the current kernel parameters.
# /sbin/sysctl -p
3) Add the following lines to "/etc/security/limits.conf" file
oracle   soft   nofile    1024
oracle   hard   nofile    65536
oracle   soft   nproc    16384
oracle   hard   nproc    16384
oracle   soft   stack    10240
oracle   hard   stack    32768
oracle   hard   memlock    134217728
oracle   soft   memlock    134217728
4) The following packages are listed as required. Many of the packages should be installed already.
# OL7
yum install bc
yum install binutils
yum install compat-libcap1
yum install compat-libstdc++
yum install dtrace-modules
yum install dtrace-modules-headers
yum install dtrace-modules-provider-headers
yum install dtrace-utils
yum install elfutils-libelf
yum install elfutils-libelf-devel
yum install fontconfig-devel
yum install glibc
yum install glibc-devel
yum install ksh
yum install libaio
yum install libaio-devel
yum install libdtrace-ctf-devel
yum install libXrender
yum install libXrender-devel
yum install libX11
yum install libXau
yum install libXi
yum install libXtst
yum install libgcc
yum install librdmacm-devel
yum install libstdc++
yum install libstdc++-devel
yum install libxcb
yum install make
yum install net-tools (for Oracle RAC and Oracle Clusterware)
yum install nfs-utils (for Oracle ACFS)
yum install python (for Oracle ACFS Remote)
yum install python-configshell (for Oracle ACFS Remote)
yum install python-rtslib (for Oracle ACFS Remote)
yum install python-six (for Oracle ACFS Remote)
yum install targetcli (for Oracle ACFS Remote)
yum install smartmontools
yum install sysstat
# rpm -q package_name
# rpm -qa --queryformat "%{NAME}-%{VERSION}-%{RELEASE} (%{ARCH})\n" | grep package_name # rpm -q binutils compat-libstdc++ gcc glibc libaio libgcc libstdc++ make sysstat unixodbc
5) Create the new groups and users.
#groups for database management
# groupadd -g 2000 oinstall
# groupadd -g 2001 dba
# groupadd -g 2003 oper
Add user Oracle for database software
# useradd -u 1000 -g oinstall -G dba,oper oracle
# passwd oracle
7) Create directory structure as user root
$ mkdir -p /u01/app/oracle/product/19.0.0/dbhome_1
$ chown -R oracle:oinstall /u01
$ chmod -R 775 /u01
Installation:
1) Log into the oracle user. If you are using X emulation then set the DISPLAY environmental variable.
DISPLAY=<machine-name>:0.0; export DISPLAY
$ export ORACLE_BASE=/u01/app/oracle
$ export ORACLE_HOME=$ORACLE_BASE/product/19.0.0/dbhome_1
$ export PATH=$ORACLE_HOME/bin:$PATH

# Unzip software.
cd $ORACLE_HOME
unzip LINUX.X64_193000_db_home.zip

$ pwd
/u01/app/oracle/product/19.0.0/dbhome_1
$ ./runInstaller
Launching Oracle Database Setup Wizard...
3) Here I have choosen "Set Up Software Only", to install the database software.You can choose "Create and configure a single instance database" option, If you want to install database software and create database in single shot.. In this article, I will create database separately using DBCA.
Click Next to continue the 19c installation.
Click Next to continue the 19c installation.

4) Select Database Installation Option, Accept default "Single instance database installation" and click Next button

5) Select Database Edition, You can select here type of binaries to install. Once it’s done click Next button.

6) Specify Installation Location, here you should see directories for ORACLE_BASE and ORACLE_HOME for your binaries according to environmental settings. Click Next button.

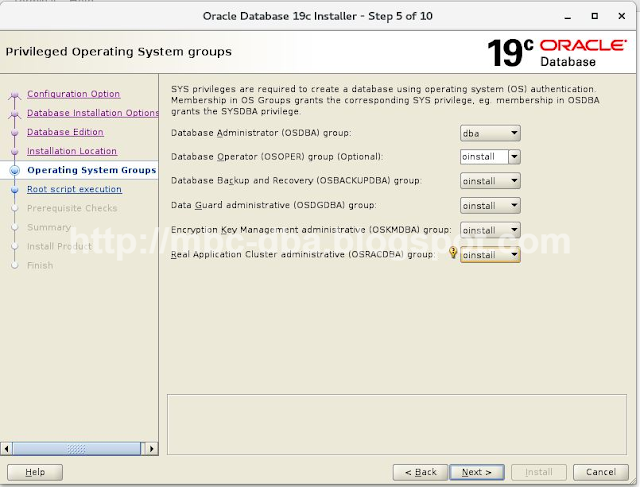
7) Operating system groups, here you can specify OS group for each oracle group. Change default groups to dba and oinstall and click Next button.

Click Next


8) Check Prerequisite checks for 19c database installation and click Next

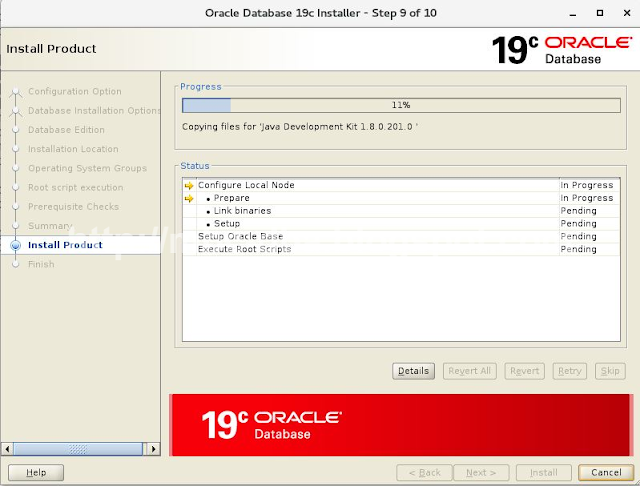
9) Summary, If everything is fine, then click Install button. It’s the last moment to come back to each of previous point and make changes.

Product Installation in-progress

10) Execute configuration script, once binaries are installed the last step is to run root.sh script as user root.

# /u01/app/oracle/product/19.0.0/dbhome_1/root.sh
Performing root user operation.

The following environment variables are set as:
    ORACLE_OWNER= oracle
    ORACLE_HOME=  /u01/app/oracle/product/19.0.0/dbhome_1

Enter the full pathname of the local bin directory: [/usr/local/bin]:
   Copying dbhome to /usr/local/bin ...
   Copying oraenv to /usr/local/bin ...
   Copying coraenv to /usr/local/bin ...


Creating /etc/oratab file...
Entries will be added to the /etc/oratab file as needed by
Database Configuration Assistant when a database is created
Finished running generic part of root script.
Now product-specific root actions will be performed.
Oracle Trace File Analyzer (TFA - Standalone Mode) is available at :
    /u01/app/oracle/product/19.0.0/dbhome_1/bin/tfactl

Note :
1. tfactl will use TFA Service if that service is running and user has been granted access
2. tfactl will configure TFA Standalone Mode only if user has no access to TFA Service or TFA is not installed

#
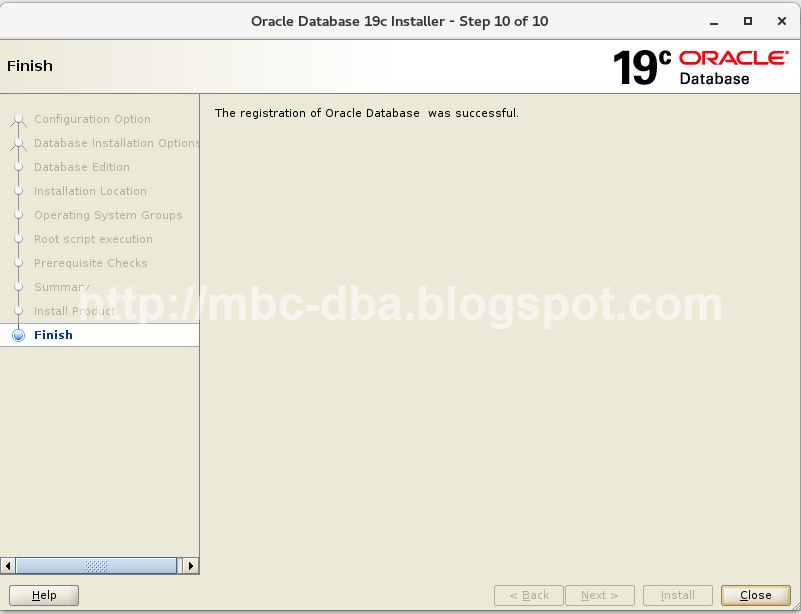
11) After successful installation click Close button.
Database Creation:
Creating database using the Database Configuration Assistant (DBCA).
1) Invoke DBCA
# dbca
2) Select Create a database option and click Next

3) Select Creation Mode as Advanced Configuration and click Next

4) select Database Deployment as General Purpose or Transnational Processing and click Next

5) Enter Database name and If you want to create pluggable database then choose Create a container database with one or more PDBs option and creare Pluggable Database. Then Click Next

6) Choose database file location and click Next

7) Its a testing machine so not Enabling Archive log mode for the Database. If you want to enable Archive log mode then choose both options and Click Next

8) Click Next.


9) Enter Administrative password and click Next

10) Choose Create Database option and click Next

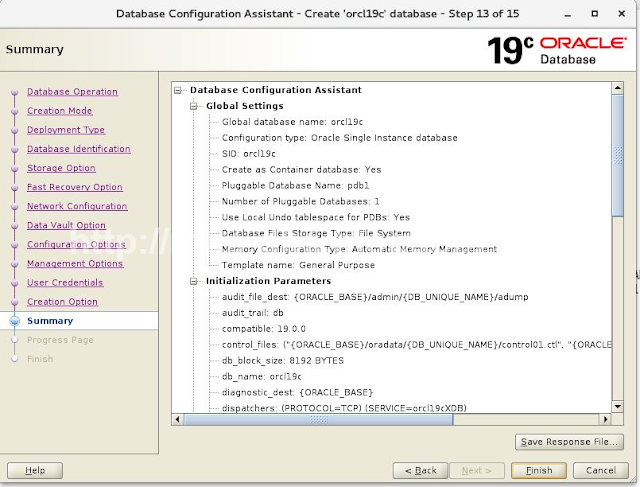
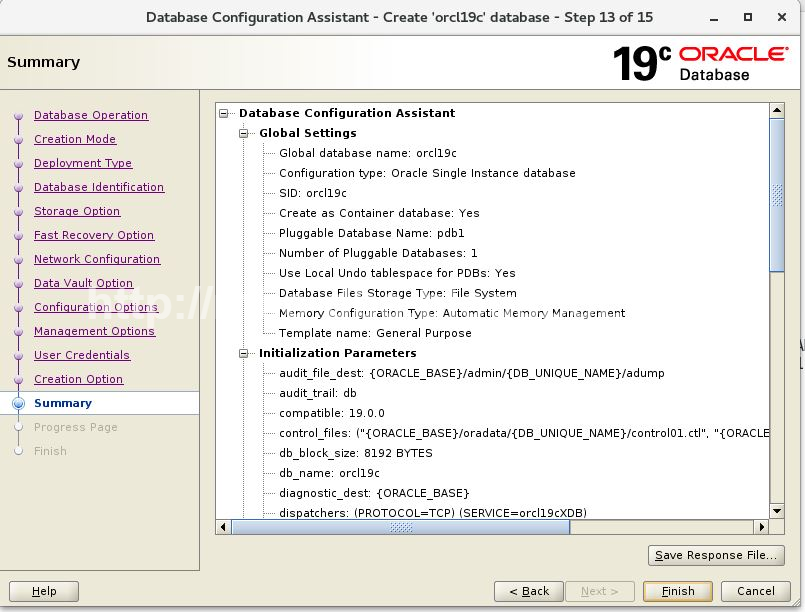
11) Summary, If everything is fine, then click Finish button to create the database. If you want to make any changes click back button and modify accordingly.

12) Click Close button.

$ sqlplus / as sysdba

SQL*Plus: Release 19.0.0.0.0 - Production on Thu Jul 11 07:10:41 2019
Version 19.3.0.0.0

Copyright (c) 1982, 2019, Oracle.  All rights reserved.


Connected to:
Oracle Database 19c Enterprise Edition Release 19.0.0.0.0 - Production
Version 19.3.0.0.0

SQL> select instance_name, status from v$instance;

INSTANCE_NAME  STATUS
---------------- ------------
orcl19c   OPEN

SQL> select banner from v$version;

BANNER
--------------------------------------------------------------------------------
Oracle Database 19c Enterprise Edition Release 19.0.0.0.0 - Production

SQL>
Hope this article will help you and please give your valuable comments !!
Thanks,
Chowdari
ReplyDeleteYour good knowledge and kindness in playing with all the pieces were very useful. I don’t know what I would have done if I had not encountered such a step like this.
Oracle training in Chennai
| Best Oracle training in Chennai | Top oracle training in Chennai |Oracle training Institute in Chennai | Oracle training in KK nagar
This data is magnificent. I am impressed with your writing style and how properly you define this topic. After studying your post, my understanding has improved substantially.
ReplyDeleteBest Online Oracle Training Institute in Delhi, NCR
Certified Online Python Training Institute in Delhi, NCR
Such a great articles in my carrier, It's wonderful commands like easiest understand words of knowledge in information's.
ReplyDeleteCore to Advanced Digital Marketing Training Course in Delhi, India
Learn Complete Advanced Excel Training Course in Delhi, NCR
Implementation Module
ReplyDeleteGenex requires an implementation module. Please see the Getting Started guide for more information
Configuration
Genex offers a variety of configuration options. Please see the configuration guide for more information database installation
Specialized DBA consultants helping you navigate data strategy,
Partnership
No matter your requirement, whether it is long-term or short, you gain our skilled consultants as partners who will guide you towards right data decisions
Knowledge Support
With our thorough research capabilities, we ensure none of your data decisions are uninformed
Service tailored for you
We guarantee a better ROI with the right services and skillsdatabase installation
Wonderful blog. Thanks for sharing informative blog. it's very useful to me.
ReplyDeleteOracle DBA Training